


Buy anything from 5,000+ international stores. One checkout price. No surprise fees. Join 2M+ shoppers on Desertcart.
Desertcart purchases this item on your behalf and handles shipping, customs, and support to Vanuatu.
๐ดโโ๏ธ Upgrade your ride, carry your world
The Schwinn Deluxe Alloy Rear Bike Rack is a lightweight, durable aluminum rack designed to fit most adult bicycles. It supports up to 20 pounds of cargo, mounts easily to seat posts with included shims, and features steel side rails for secure pannier or bag attachment. Perfect for commuters and weekend adventurers seeking reliable, versatile bike storage.


| ASIN | B0030RS5CA |
| Best Sellers Rank | #23,919 in Sports & Outdoors ( See Top 100 in Sports & Outdoors ) #8 in Bike Cargo Racks |
| Brand | Schwinn |
| Brand Name | Schwinn |
| Color | Black |
| Customer Reviews | 4.4 out of 5 stars 2,640 Reviews |
| Global Trade Identification Number | 00726599756172 |
| Included Components | Seat Post Shims (x3) |
| Item Dimensions L x W x H | 18.11"L x 5.16"W x 0.71"H |
| Item Type Name | Schwinn Deluxe Alloy Rear Rack |
| Item Weight | 0.67 Kilograms |
| Load Capacity | 2E+1 Pounds |
| Manufacturer | Schwinn |
| Manufacturer Part Number | 2121433 |
| Material | Aluminum |
| Material Type | Aluminum |
| Model Number | SW75617AZ-12 |
| Mount Type | Rear Seat Mount |
| Mounting Type | Rear Seat Mount |
| Orientation | Rear |
| Product Dimensions | 18.11"L x 5.16"W x 0.71"H |
| UPC | 726599756172 |
| Unit Count | 1.0 Count |
| Warranty Description | Limited Lifetime Warranty |
S**A
Legitimately surprised at the quality for the price
I wanted something light and basic to throw on my mountain bike that wouldn't impact me using it as a mountain bike, but would allow me to also use it to carry a bag if I use it to commute anywhere. This fit my bike perfect, took 30 seconds to install, is extremely sturdy feeling and will fit my needs perfectly. It isn't very long, so it won't hold a ton of things. But it can strap a single bag to it no problem. I particularly like the bars that hang down because it provides a little barrier from the objects you're carrying interfering with your rear tire. It's also extremely light. I wish I had weighed it out of the box, but when the box arrived it was so light that I thought there was a mistake in shipping at first. It's entirely unnoticeable when attached to the bike and still allows me to use it as a mountain bike without hindering performance.
J**Y
A good rack and easy to install
This is a sharp-looking, strong, inexpensive (at just over $10), and easy-to install product. Certainly worth more than I paid for it. After reading the reviews, I was a little bit concerned that this would be difficult to install. It absolutely was not. I removed the bolts all the way, sprayed them with WD40, as another reviewer suggested, tried 3 shims which was too tight, tried two shims which was just right, and bolted it onto the bike. It fit so tight that I was able to turn the bicycle seat by tugging on the rack, so I had to tighten the bolt that holds the seat post on too. Well under 20 minutes from opening the package to riding the bike. (It seems to be the case that I have the newer version of the shim system - make sure you get that one. It has 3 round shims that nest inside each other and are open on one end. I'm not sure if it is the recommended procedure, but I line up all the open ends of the shims, which allows for easier expansion.) I haven't tried it with a heavy load yet, but I'm confident it will hold more than the 22 lbs advertised.
J**E
Pretty good, easy to install and secures cargo well! Slight issue with the screws, had to replace those.
I've only had it on my road bike for a few weeks but it's been great. I use the cord it came with an two additional bungees to strap my briefcase and lunch to it on my 5+mile trip to the office. It was easy to install and doesn't look as busy as a rear rack that connects to the spokes. UPDATE: On a recent ride (after 3-4 weeks of it being on my bike), one of the screws that fastens the rack to the seatpole broke in half. I was able to make it home, but with only one screw holding it on, the rack swayed and was unsafe to carry cargo. I called Schwinn to have them send me a replacement screw but they don't have parts for accessories and suggested I return it. Instead of having to go without the rack while processing a return, I spent a couple bucks on screws at Lowe's and installed sturdier, longer ones. All good, once agin.
M**E
Easy to Install Bike Rack
I honestly cannot believe anyone had any trouble with this product! Installation took all of about five minutes, even without instructions (I had left the little cardboard cover wrapped around the rack in case I had to return it, based on reviews of so much trouble with it but ordering it anyway - the instructions are on the inside of the cover). First of all, this thing weighs next to nothing, so it's not going to add any burden to your pedaling. And it's got a long bungee cord to hold things on (if it's not satisfactory, just go buy a couple little bungee cords from your nearest department store). There are three plastic, cylindrical stacking shims of different sizes that come with this rack, each shim fits inside the next larger and the largest fits inside the rack clamp (where it attaches to the seat post). The clamp has two allen bolts already in place to tighten it to the post. The clamp shouldn't need any spreading, at least it didn't in my case (I have a Schwinn Avenue Hybrid 700c). I needed the two larger of the three shims in the clamp for my bike - it slid right onto the post. Here's how I did it: After first noting the depth of the post in the frame tube (you can mark this position or just make a mental note of the position), I removed the bike seat with its post from the bike frame (the quick-release lever on my bike allowed this). Next, I put the middle-sized shim inside the largest shim, then put these two shims together inside the bike rack clamp opening with the shim collars upward in the clamp, relative to how the rack goes on the seat post (make sure both allen bolts in the clamp are as loose as they can get without falling out of their holes, just to make sure the clamp is as open as it can go without having to force it open any further). The rack with its two shims slid right up the seat post with no trouble at all, although it was a good and snug fit. The upward orientation of the shim collars in the clamp kept the shims from sliding out or off the clamp as it was slid onto the seat post. I had intended to use a little dish soap and water to lubricate the surfaces if it became necessary, but it wasn't. Don't use oil to help the shim slide onto the post, as the oil will remain a lubricant and allow movement of the shim on the post even after the clamp is tightened as much as possible - the dishwater soon dries without leaving any lubricating residue. (Bikes other than Schwinn may take a little more work, I don't know, but I would imagine seat post sizes are probably pretty standard - I may be wrong; this is, after all, a Schwinn product and is therefore likely made to fit Schwinn bikes in particular, but it does have three sizes of shims.) Now tighten the allen bolts on the clamp so that the clamp is tight on the seat post, visually keeping the seat and the rack aligned. Then put the post back into the bike frame and tighten the quick-release clamp, again visually aligning the seat and rack together with the longitudinal axis of the bike and getting the seat adjusted to the same height it was. That's all there is to it. It's actually very quick and easy. Quite a product for a mere 8 bucks!
D**R
Nice rack and solid construction
I installed this rack in 5 minutes with just a hex wrench thanks to the quick release seatpost on my Kent beach cruiser. Admittedly, I read all the reviews here before it was purchased which led me to know how the shims should fit. Basically, there are 2 plastic shims that fit inside the rack's seatpost clamp and some kind of plastic cylindrical insert I would assume is an adapter in case you have a non standard size smaller seatpost diameter. I released my seatpost clamp, pulled the seat and post out of the frame, removed the insert and left both shims in place then slid the rack onto the seatpost and inserted the seat and post back into the frame. I did back the hex head cap screws out of the rack's clamp to add some antiseize compound to the threads before tightening the clamp to the post. I positioned the rack and seat straight and snugged the quickrelease on the seatpost tube of the bike frame. On my bike, there was a rear reflector on the seatpost which I moved to the plastic mounting plate of the rack. The rack looks like it came with the bike now that it's on although at my current seat height, there is a portion of the rack's useable space that is close to the bottom of my wide and sprung cruiser seat. update: I just mounted a Planet Bike blinky 5 taillight to the back of the rack and am very satisfied with how it went together. I also drilled a couple of small holes in the top of the rack and screwed down a zippered cordura nylon pack with sheet metal screws and fender washers. Now I can lock the double zippers together with a luggage padlock and help prevent spontaneous thefts of my posessions.
J**Y
The best 10$ you'll spend in cycling
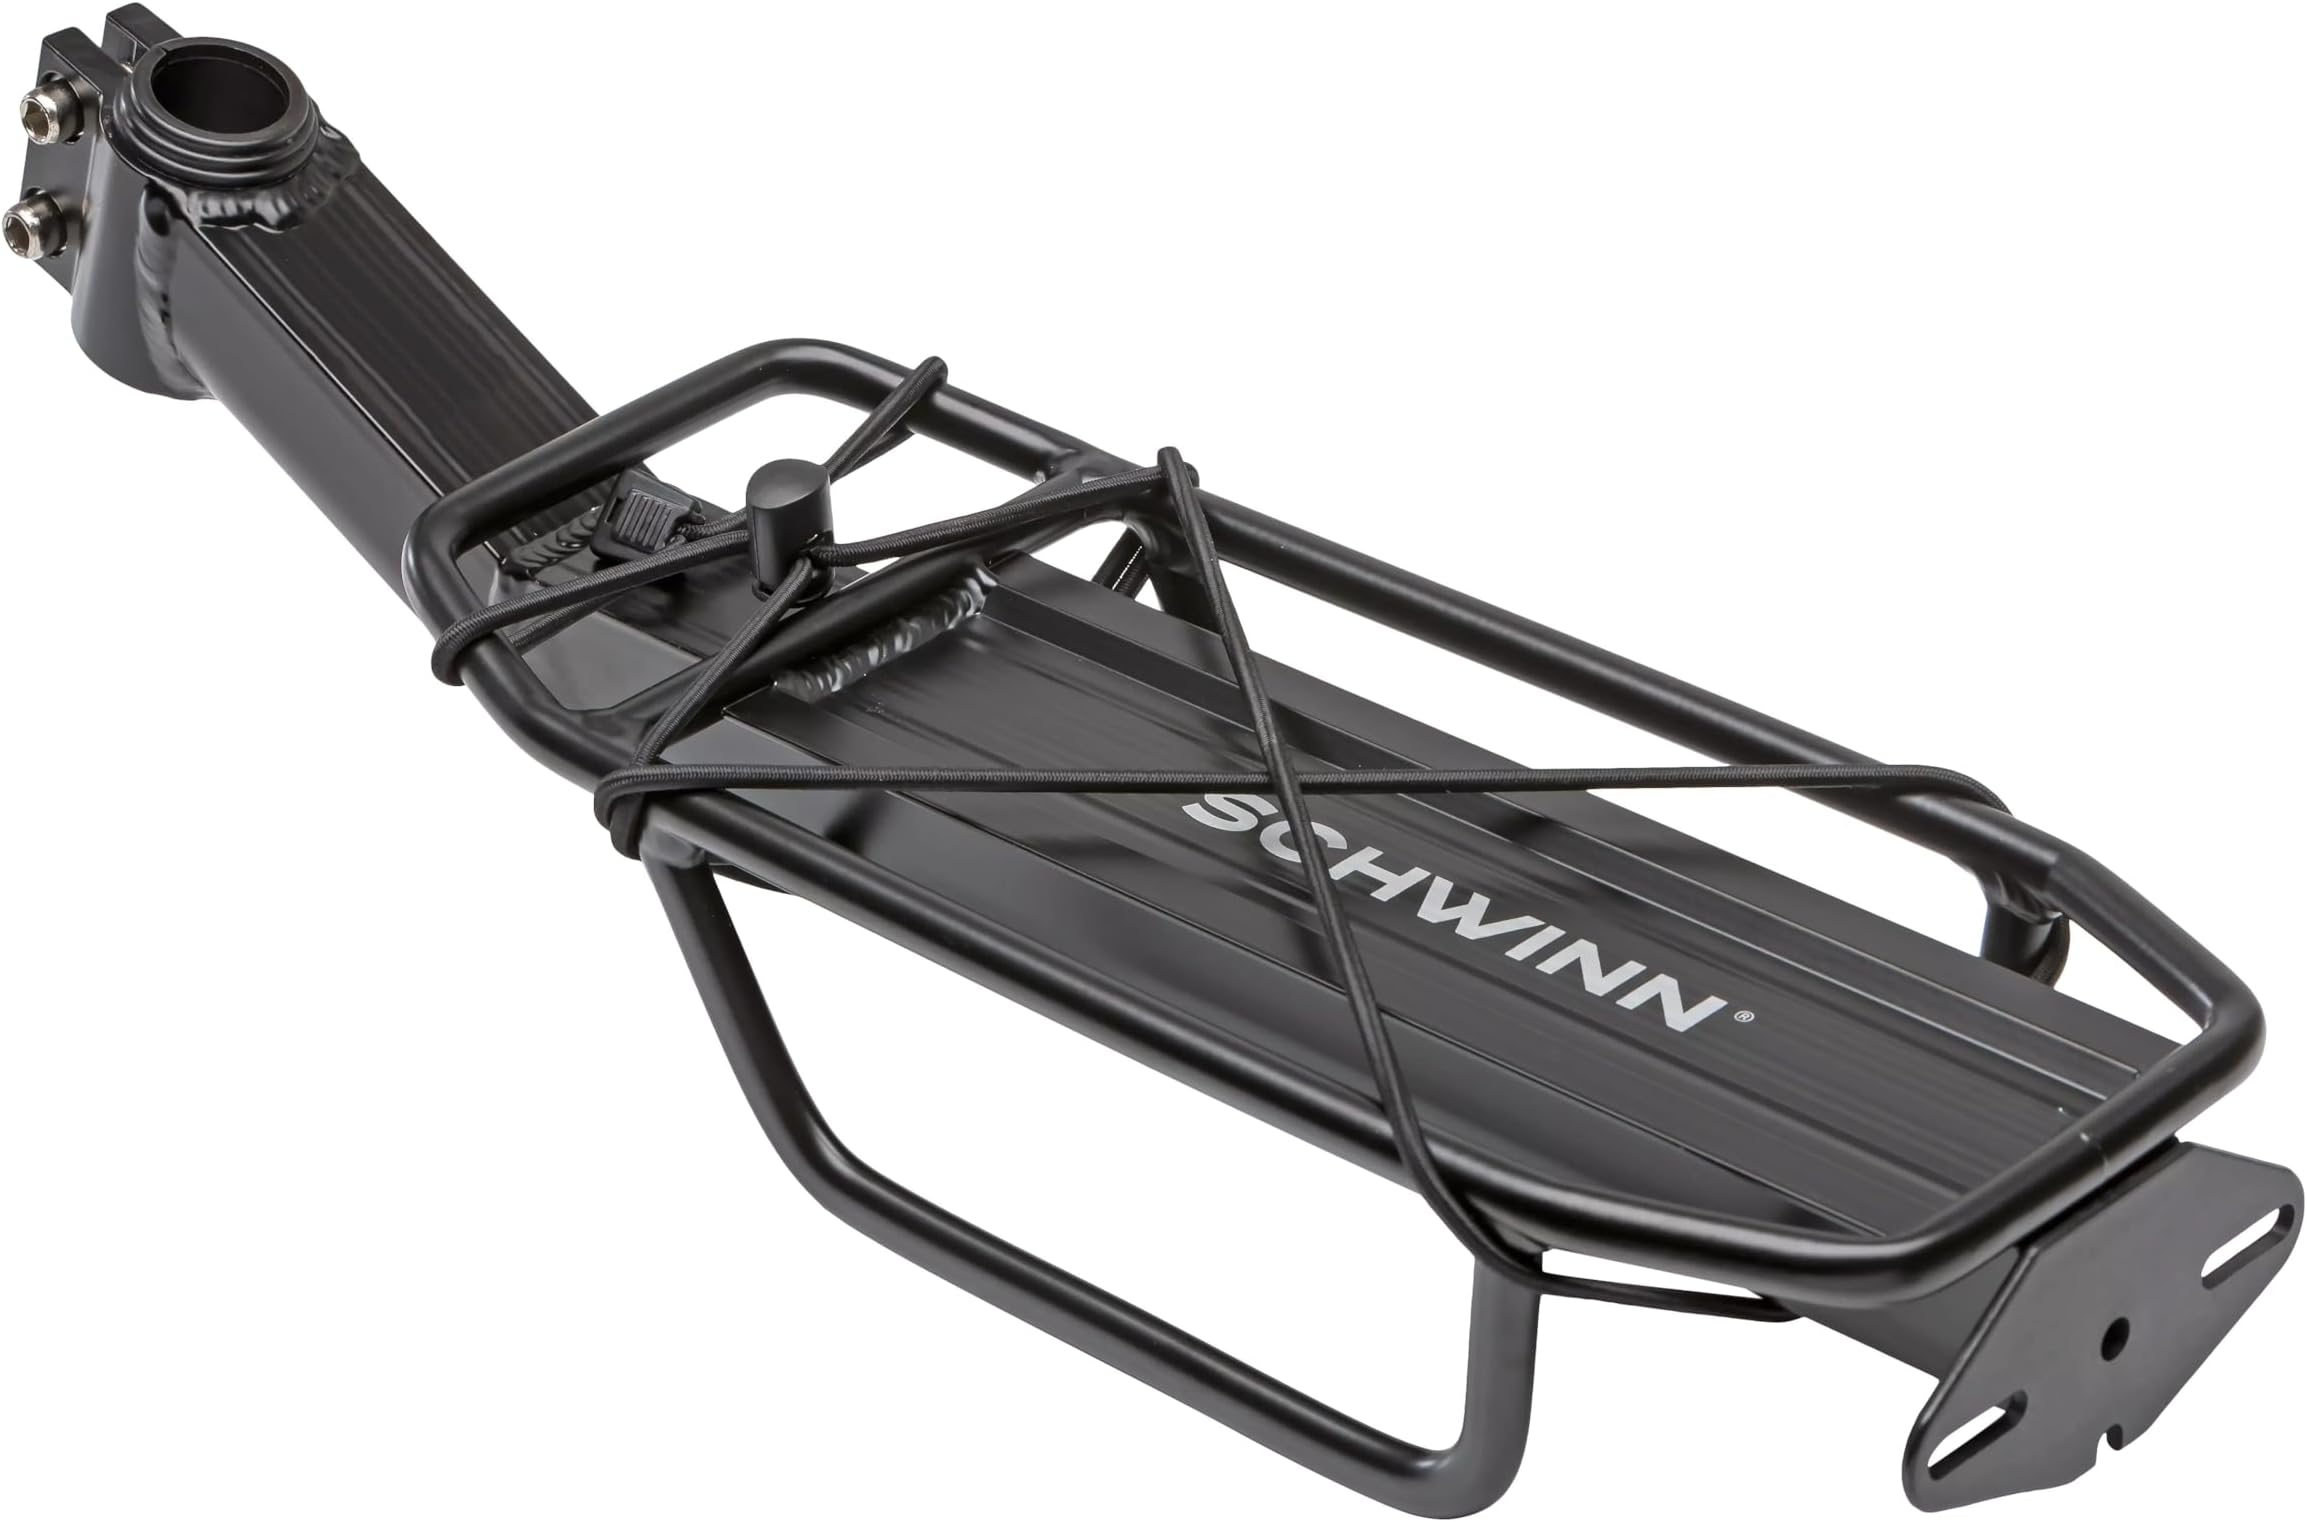
I've only had this rack a week, but it has already far exceeded expectations. For the price, this unit cannot be beaten. At first, I just carried a hard-sided lunch pale on it. Then, I decided to try and go fishing with it, since I figured using the rack would be a bit easier on my back than carrying a backpack with tackle and poles sticking out of it. After I got the backpack bungee'd to the rack, I decided there was still plenty of room, and I wouldn't mind being a bit more comfortable at the lake. I removed the backpack, slid a fold-up lawn/camping chair (typical cheap model, about 3 foot long by 3 inches tall when folded), and bungee'd that to the rack first, then bungee'd the backpack on top of that. I used homemade bungee straps made from bungee material, zip ties, and cheap carabiners. This worked well, I even did some offroading getting onto the bike trail and everything stayed pretty securely. After I made it back home (no issues), I decided I wanted to look into some different strap types - Both to help secure everything better, and to make setup/teardown a little easier and faster. I looked into several different ratchet straps, bungee cords, backpack-clip webbing, and others. I finally stumbled upon 'Lashing Straps' at Walmart. They were by Ozark trail, and came in a package of 2 12 foot webbing straps each with their own buckle. These have made this rack a complete dream. These straps are identical to the straps on my Saris Bones bike rack - They adjust very quickly, store easily, and hold very securely. They double as a crate holder for storage on the back of my kayak. These straps can be used everywhere, and they're a perfect companion for this rack if you decide to haul something bulky. I successfully carried about 30 lbs of weight, and I have reason to believe it could hold more, depending on your seat post - mine is pretty standard sized aluminum on a Cannondale road bike. To help keep the rack the most secure vertically, make sure to rest it on the bottom most of your seat post, where the seat post meets the down tube heading. This will keep it from being able to slide down. Also, use the biggest shim possible, and if you're still having issues with it swinging to the sides, line the inside with black electrical tape (both the inside of the shim and the seat post if possible). This may make it hard to put on/take off, but will make it much more secure. I haven't had any issues with mine moving even under load and with lots of bumps. Make sure to get those hex nuts in tight. Overall, this is probably the best 10$ I've spent on cycling.
C**N
Bolts Snapped During Installation? Here's a Fix
I wanted to like this rack more but had some serious problems getting it successfully installed on my bike. I removed the two mounting bolts and lubricated them with oil as other reviewers have suggested, then put the mount on my (removed) bike seat post. I tried using all three shims but they did not fit so I went with two. When I was tightening the bolts, the rack just wouldn't get snug so I kept tightening until POP! The metal bolt heads actually both snapped off from the force (the bolts broke in half). I decided to try again with a replacement rack from Amazon. This time I used the two thickest shims of the 3. It felt relatively snug before tightening the bolts. But just when I almost had it secure - POP! - one of the bolt heads snapped off again and went flying across the room. Because I liked the look and overall design of the rack, I decided to pick up a couple of replacement bolts at Home Depot. For anyone who might care to try this, it's a metric 8mm 1.25 thread bolt. I bought the 30 mm length bolt because they had them in stock. A 25mm (maybe even 20 mm) length bolt would also probably have fit. The heads are a little too large to fit into the recessed holes on the mount, but otherwise work fine. They even use the same size Allen wrench as the original bolts. Anyway, with the replacement bolts, the rack seems to be mounted just fine, very secure and the bolt heads did not snap during assembly. I do like the mount once it's secured with better bolts, but really it shouldn't be necessary to pay an extra couple of bucks for hardware just to get it securely mounted. UPDATE (August, 2015). 1 year and a couple of hundred miles later, the rack is holding up well with the replacement bolts from Home Depot. It holds items well and stays firmly in place. It also provides a nice shield against water coming up from puddles or rainy streets. The cord that comes with it isn't great but regular bungee cords work well with this rack.
I**Y
Guardian Bike Tested & Approved
Very easy to install and fit a 20" Guardian bike perfectly.
Trustpilot
1 month ago
3 days ago